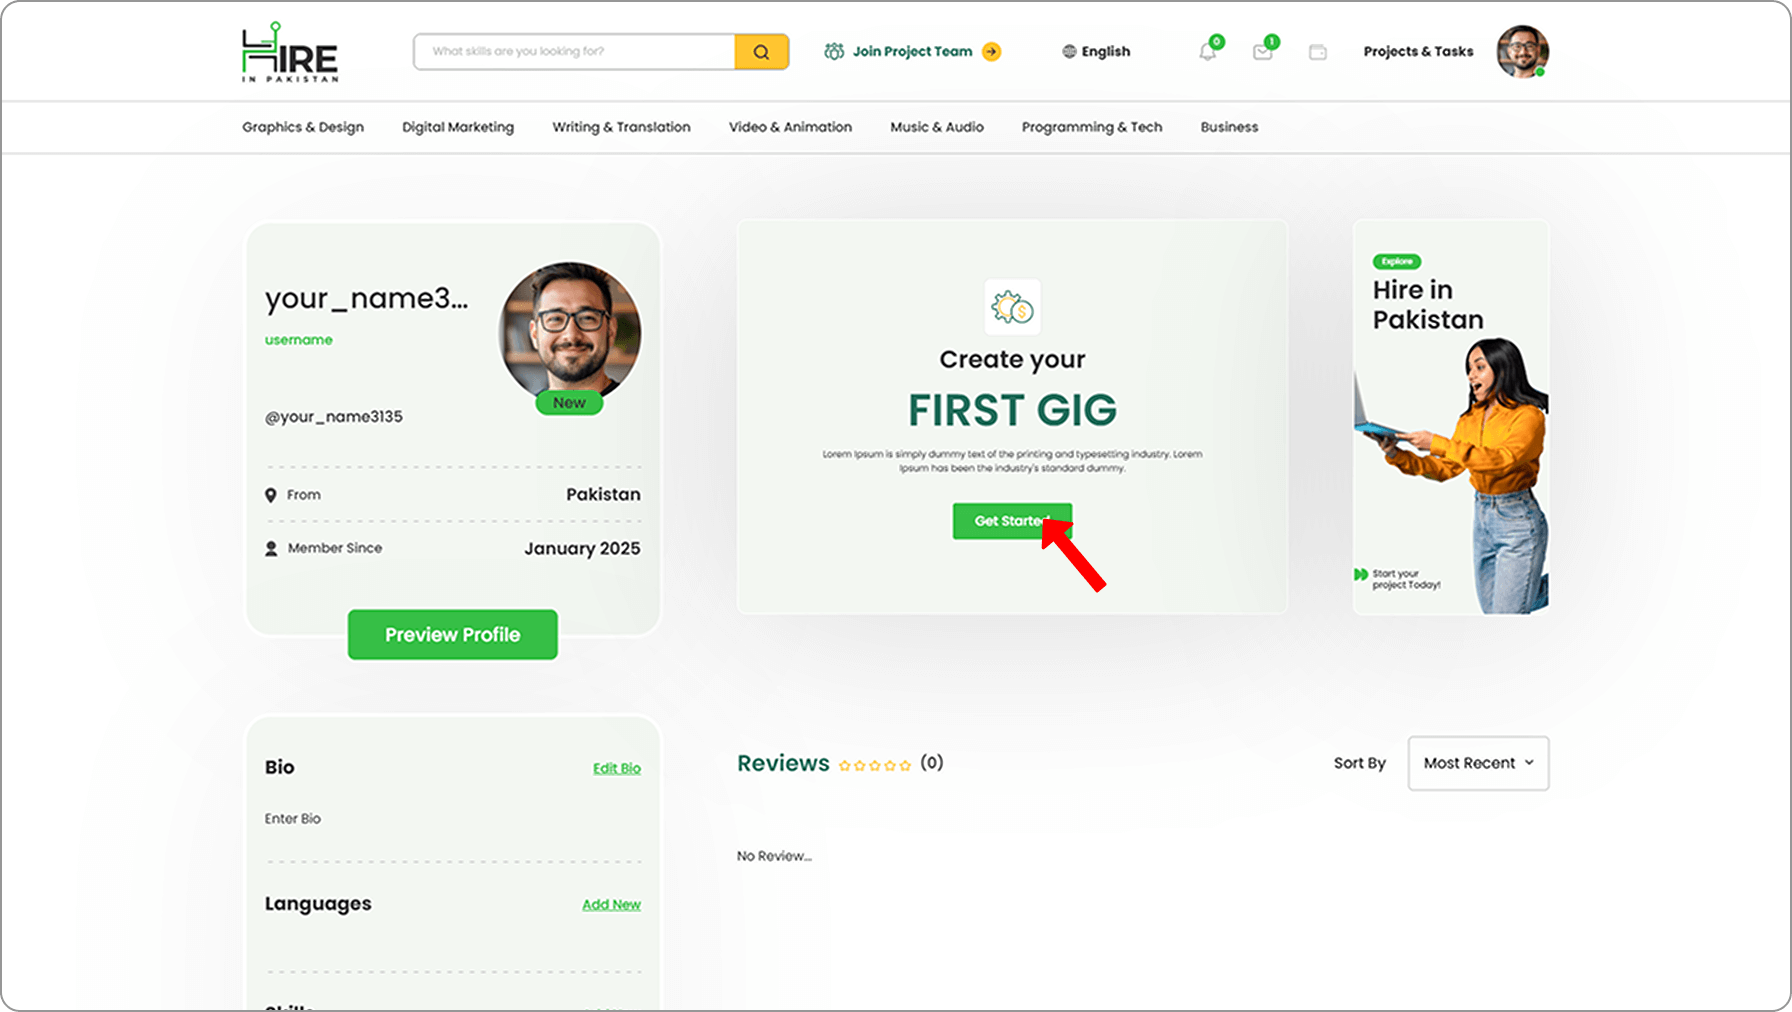
Navigate to the Post Gigs Section
Log in to your account and click on the Post Gigs tab in your dashboard.
Select “Create a New Gig” to begin.
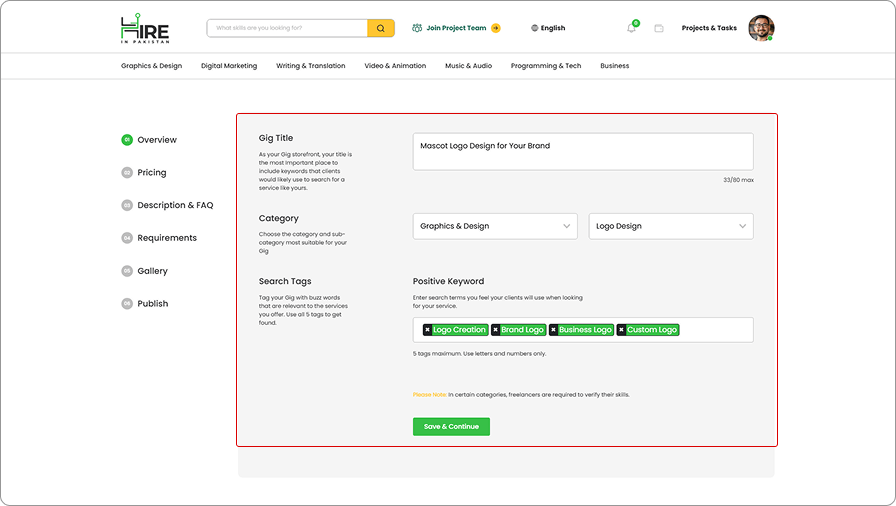
Choose a Relevant Category
Pick the category and subcategory that best match your gig’s services.
Example: If you’re a logo designer, choose “Graphic Design > Logo Design.”

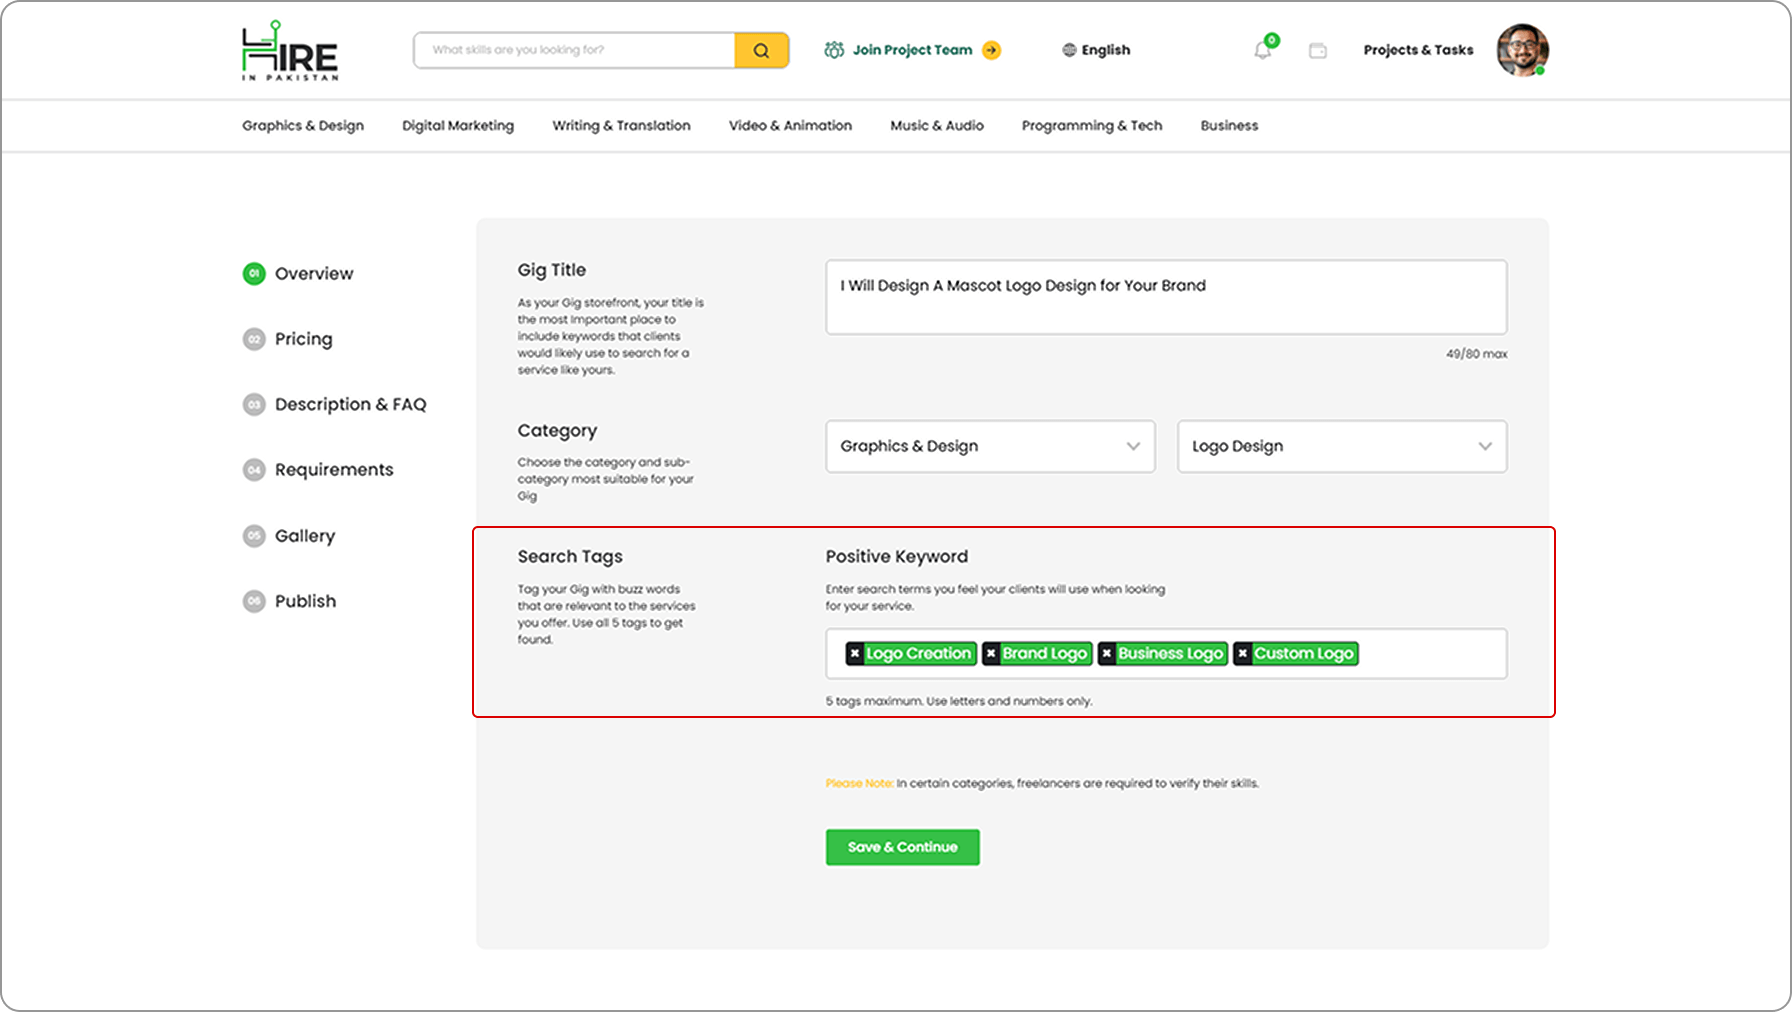
Create a Catchy Title
Write a clear and compelling title that specifies what you’re offering.
Example: “I will design a Mascot Logo for your brand.”
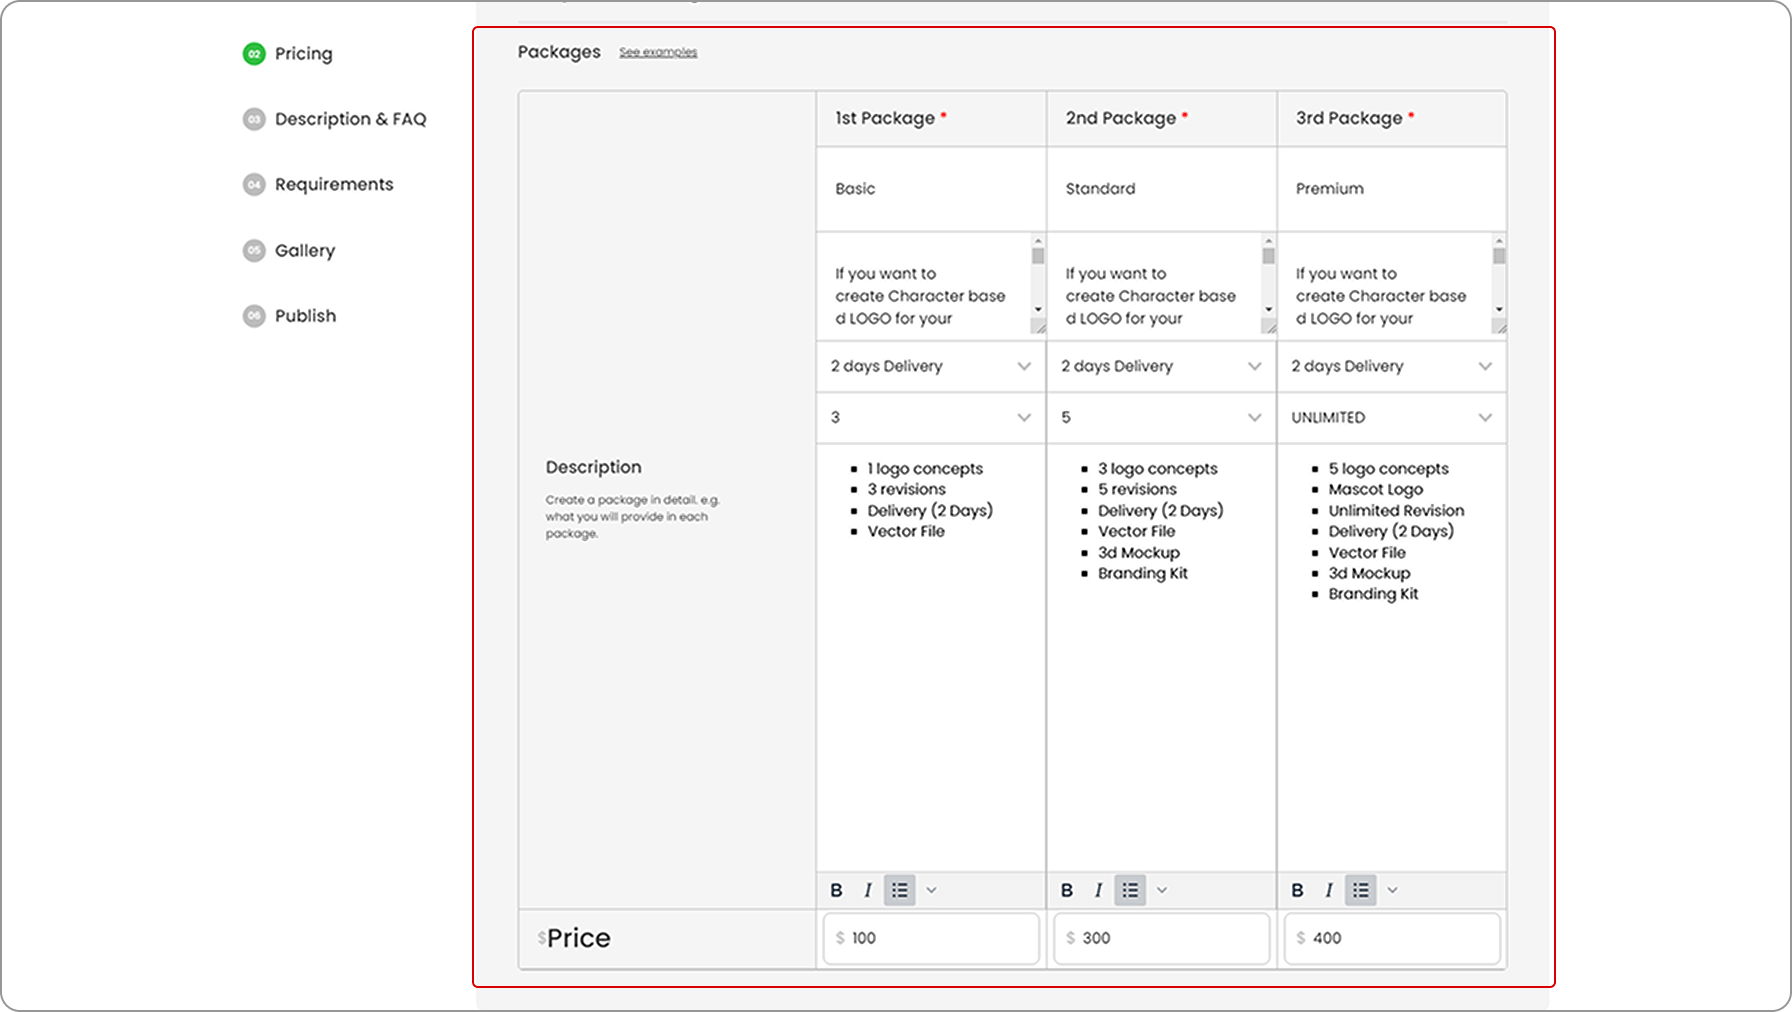
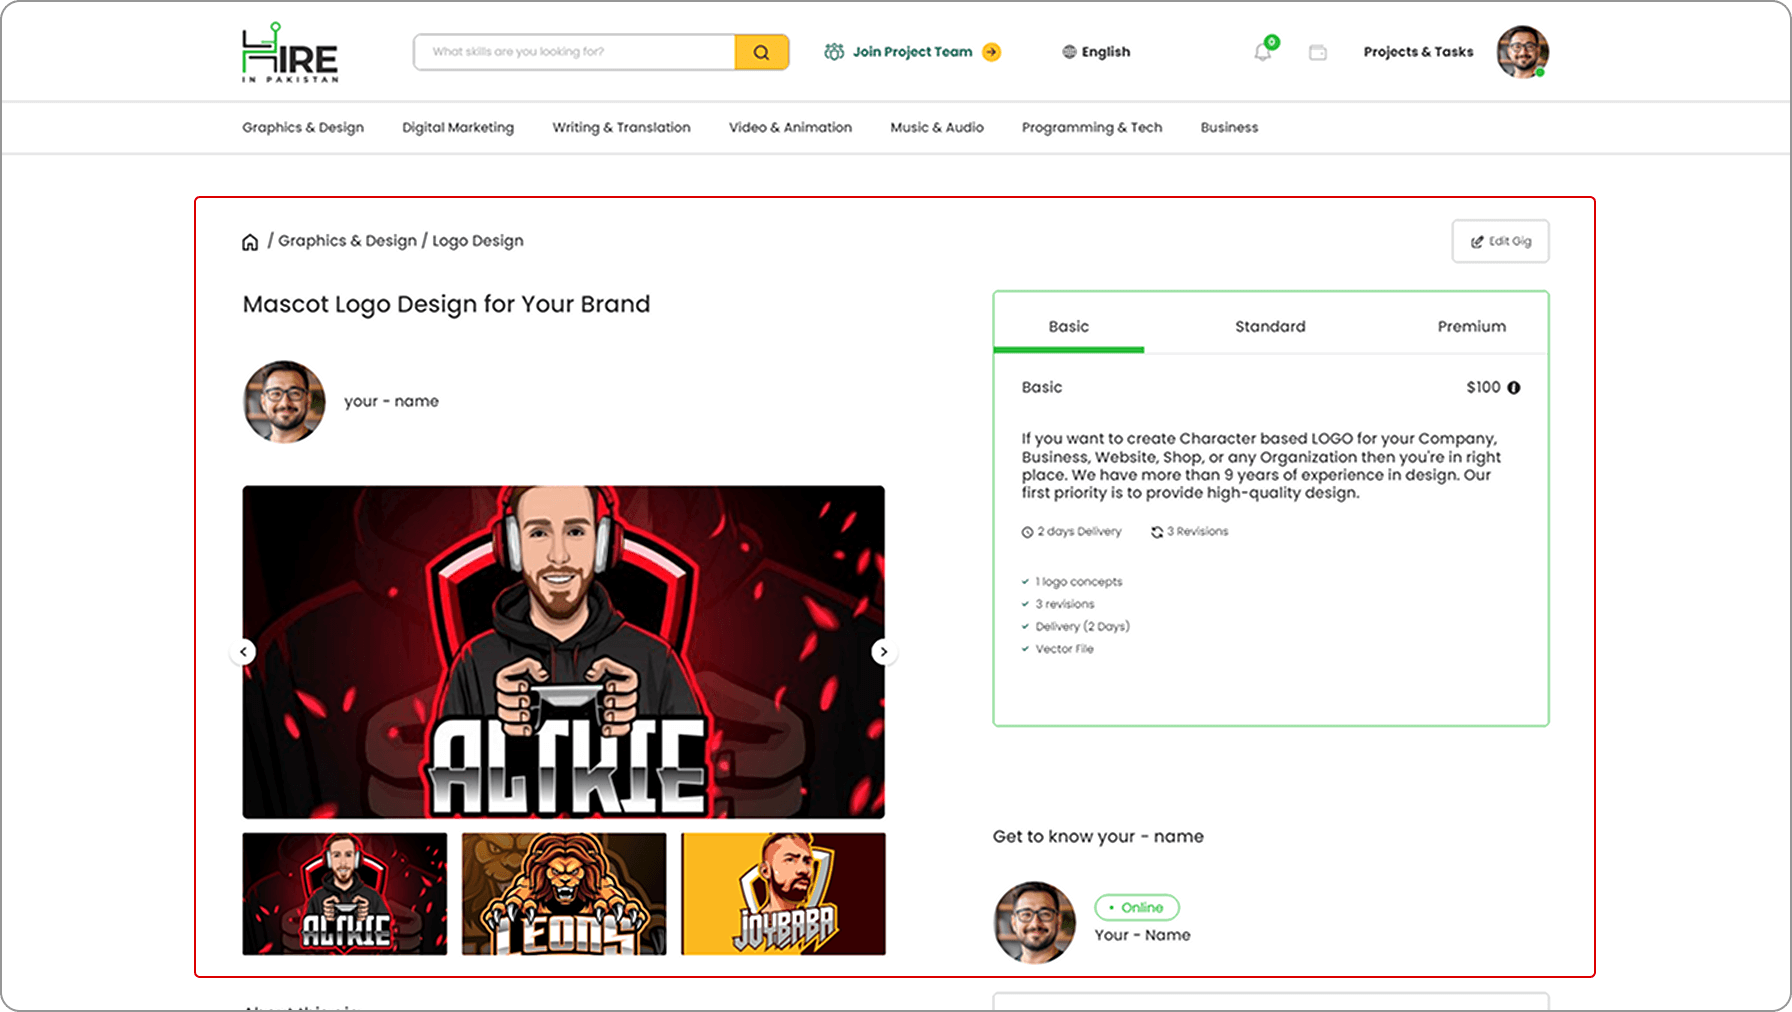
Write a Detailed Description
Explain what the client will get, how you work, and what makes you unique.
Include key details like:
Deliverables (e.g., “3 logo concepts”)
Revisions offered
Tools or methods you use

Set Your Pricing
Define your pricing structure (e.g., Basic, Standard, Premium tiers).
Specify what each package includes and the corresponding prices.
Ensure your rates are competitive and reflect your expertise.
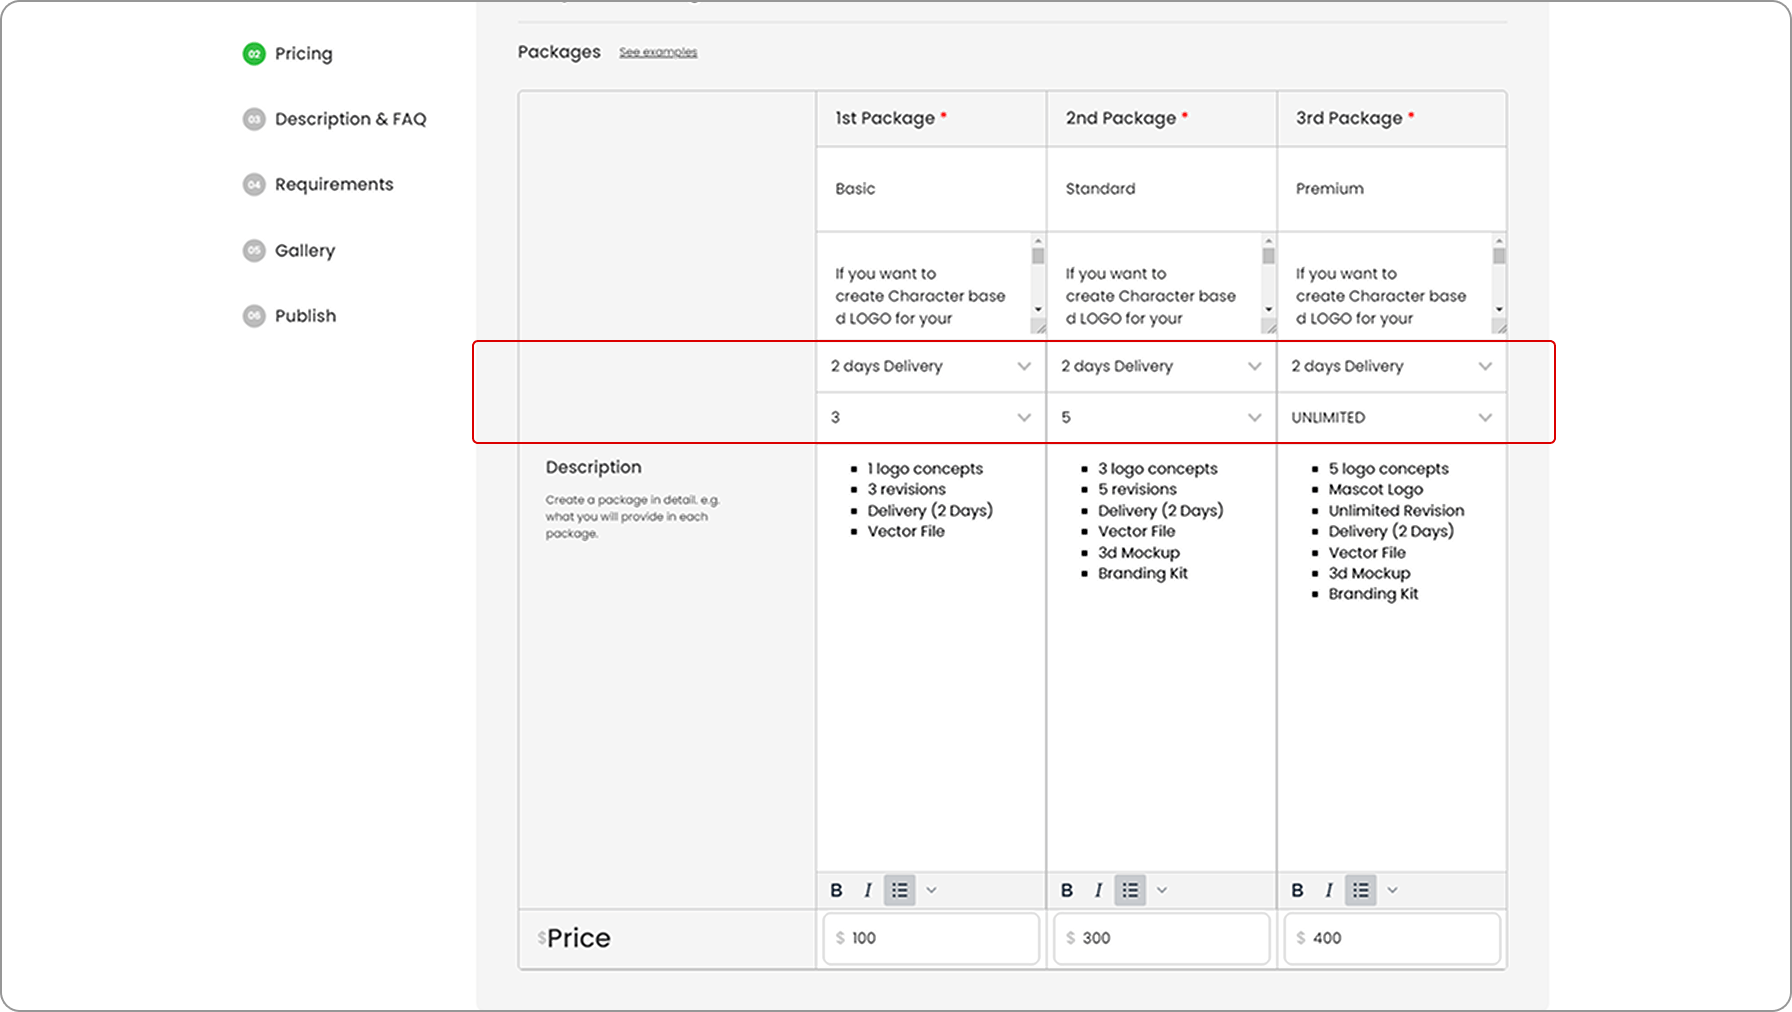
Define Delivery Time
Set realistic timelines for delivering your service.
Factor in time for revisions when estimating your delivery period.
Add Relevant Tags
Use descriptive tags to help clients find your gig through search.
Example: Tags for logo design: “Logo, Branding, Graphic Design.”
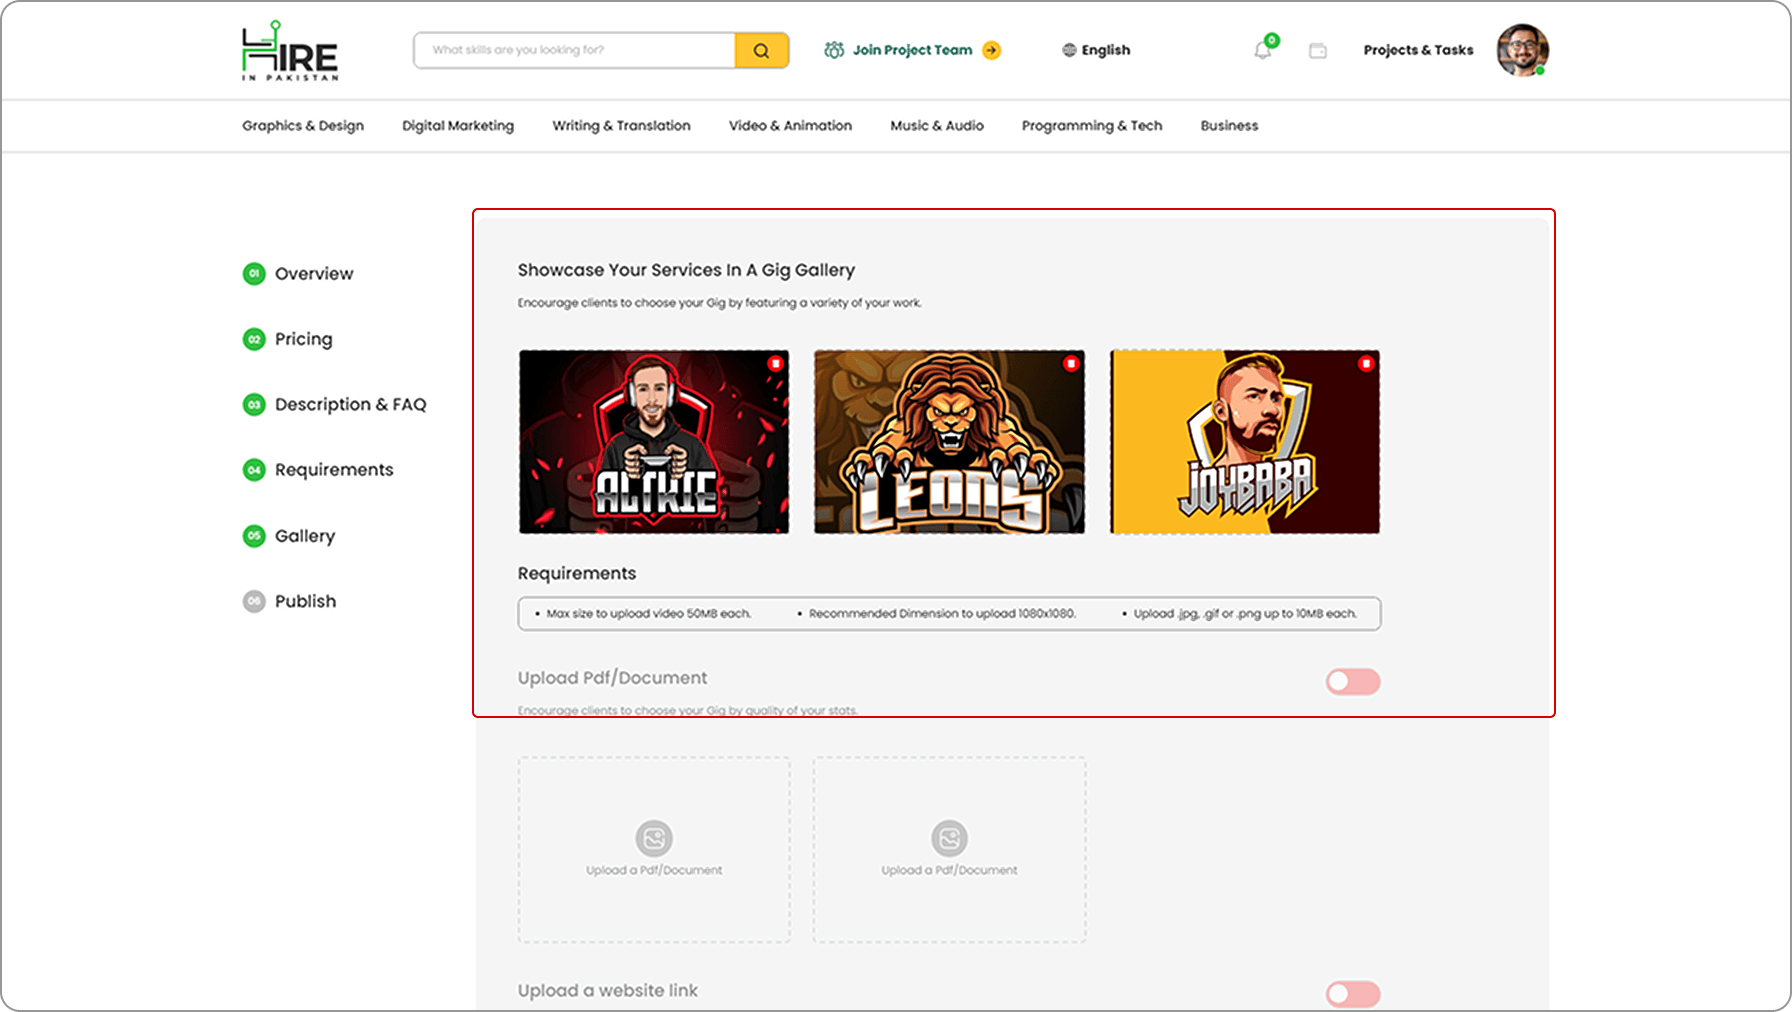
Upload Portfolio Items
Include high-quality samples of your previous work to demonstrate your skills.
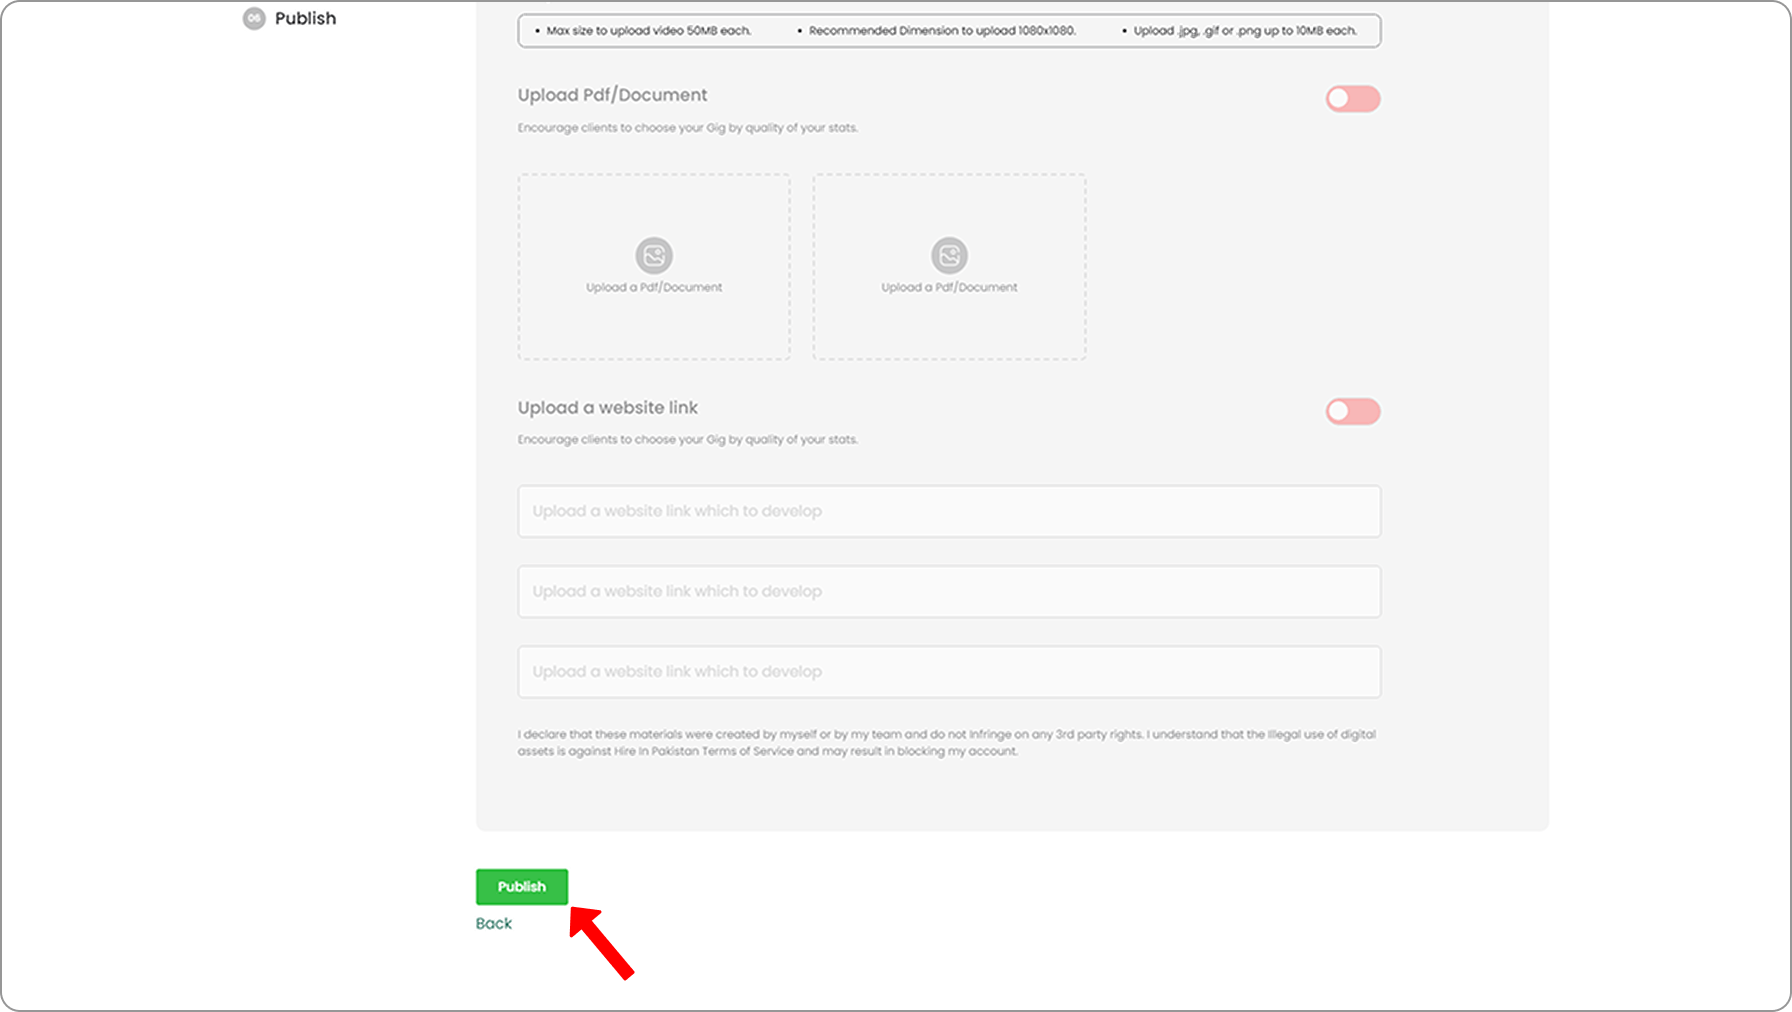
Publish Your Gig
Review all the details to ensure accuracy.
Click “Publish” to make your gig live. Clients can now view and hire you.
Tips for Successful Gigs
Be Clear: Avoid vague descriptions; clearly outline your offerings.
Be Competitive: Research similar gigs to set appealing prices and services.
Be Professional: Use proper grammar and a professional tone in your gig description.